
Troubleshooting Electric Fence Problems
Complete diagnostic guide for identifying, isolating, and fixing electric fence issues in cattle operations
Why Electric Fence Problems Happen
When an electric fence stops working properly, the problem is almost never random. Electric fencing systems fail in predictable ways based on grounding quality, vegetation load, component wear, and energizer capacity.
This troubleshooting guide provides a structured, step-by-step approach to diagnosing electric fence problems, allowing you to locate the fault quickly instead of guessing or replacing parts unnecessarily.
Core Principles of Electric Fence Troubleshooting
⚡ Electricity Always Follows a Path
Every electric fence problem can be traced to an interruption, leak, or overload in the electrical circuit. If current cannot travel from the energizer, through the fence, and back through the ground system, the fence will lose effectiveness.
🔍 Diagnose Before You Repair
Replacing parts without diagnosis wastes time and money. Always identify whether the problem is related to voltage supply, grounding, fence load, or physical damage.
📍 Start at the Energizer, End at the Fence
Troubleshooting always begins at the energizer and moves outward. If voltage is correct at the energizer, the problem exists somewhere along the fence line.
Quick Symptom-Based Diagnosis
| Symptom | Most Likely Cause | Where to Check First |
|---|---|---|
| Fence not shocking at all | No power or energizer failure | Energizer output terminal |
| Weak shock everywhere | Poor grounding | Ground rods and connections |
| Strong near charger, weak far away | Voltage drop or load | Fence line midpoints |
| Fence works intermittently | Loose connection or vegetation | Splices, corners, gates |
| Cattle ignoring fence | Low voltage or poor visibility | Voltage reading + wire height |
Step-by-Step Electric Fence Troubleshooting Process
Step 1: Test the Energizer Output
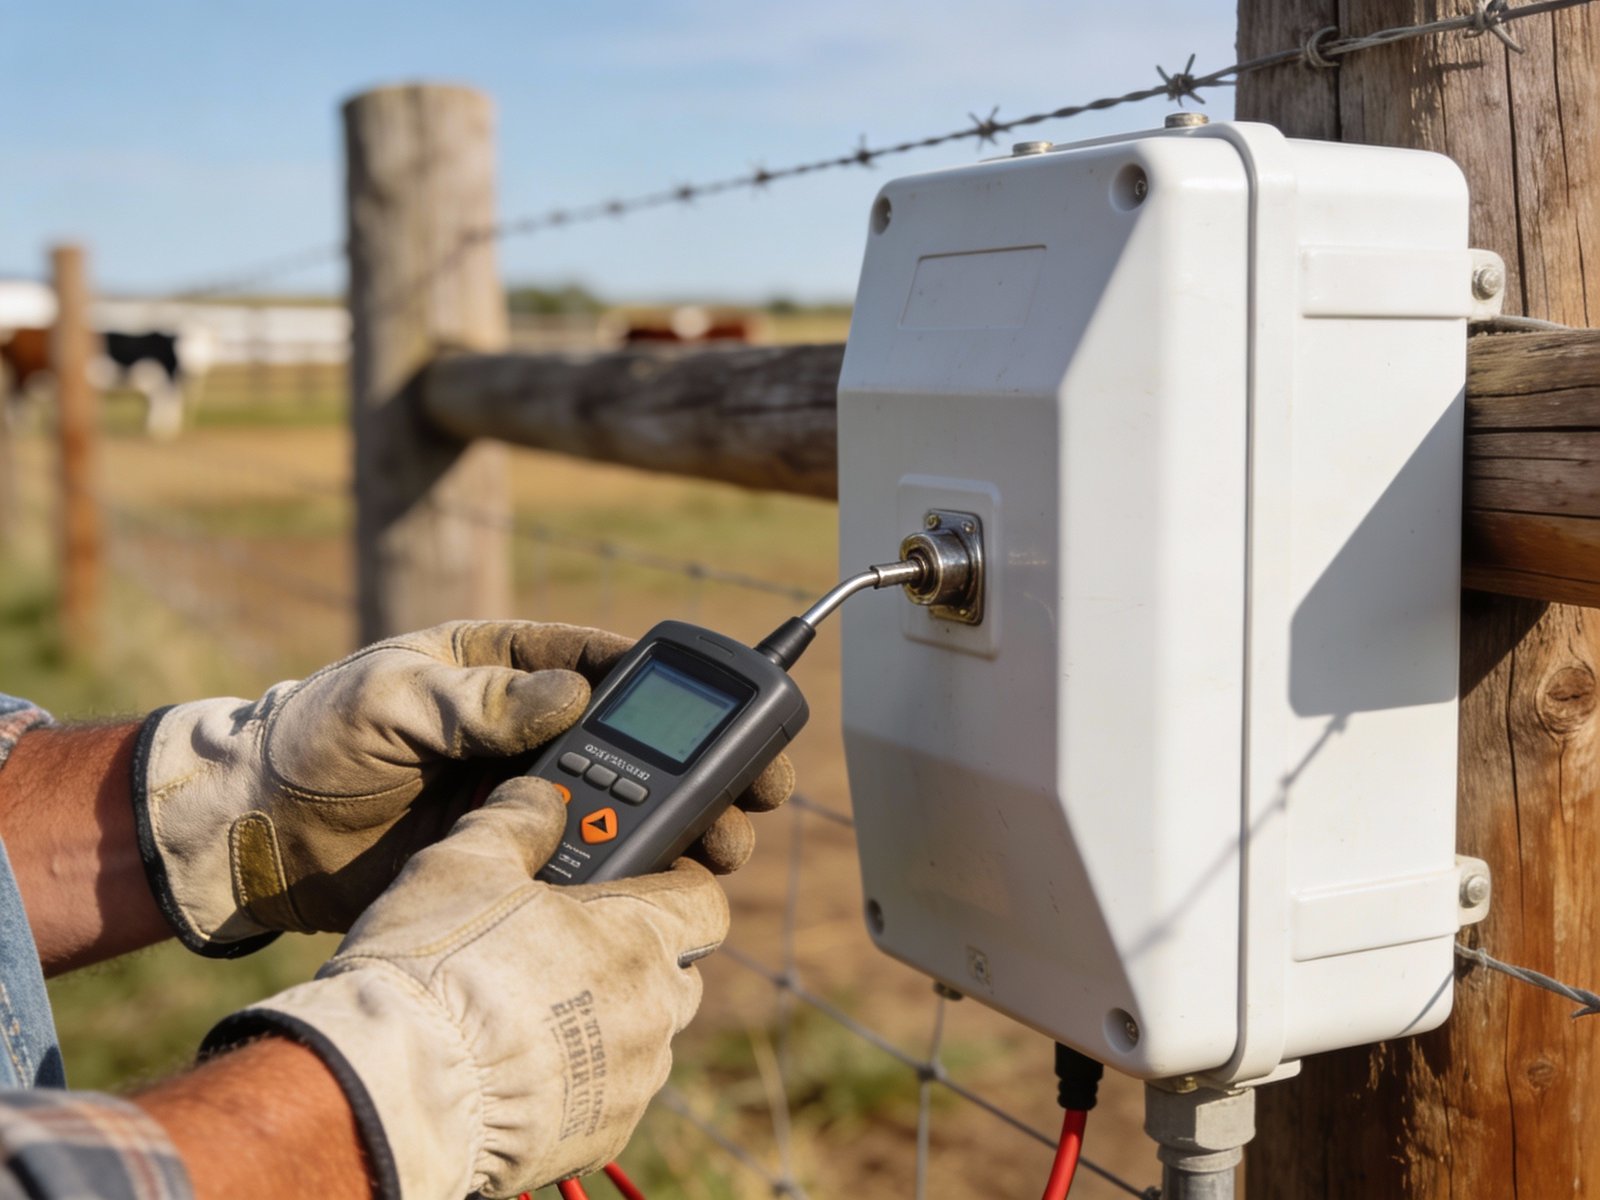
Disconnect the fence from the energizer and test voltage directly at the output terminal using a fence tester. If voltage is low here, the problem is the energizer or power supply.
- Check power source (AC, battery, or solar)
- Inspect indicator lights or displays
- Listen for consistent pulse rhythm
- Look for readings of 7,000 volts or higher with no load
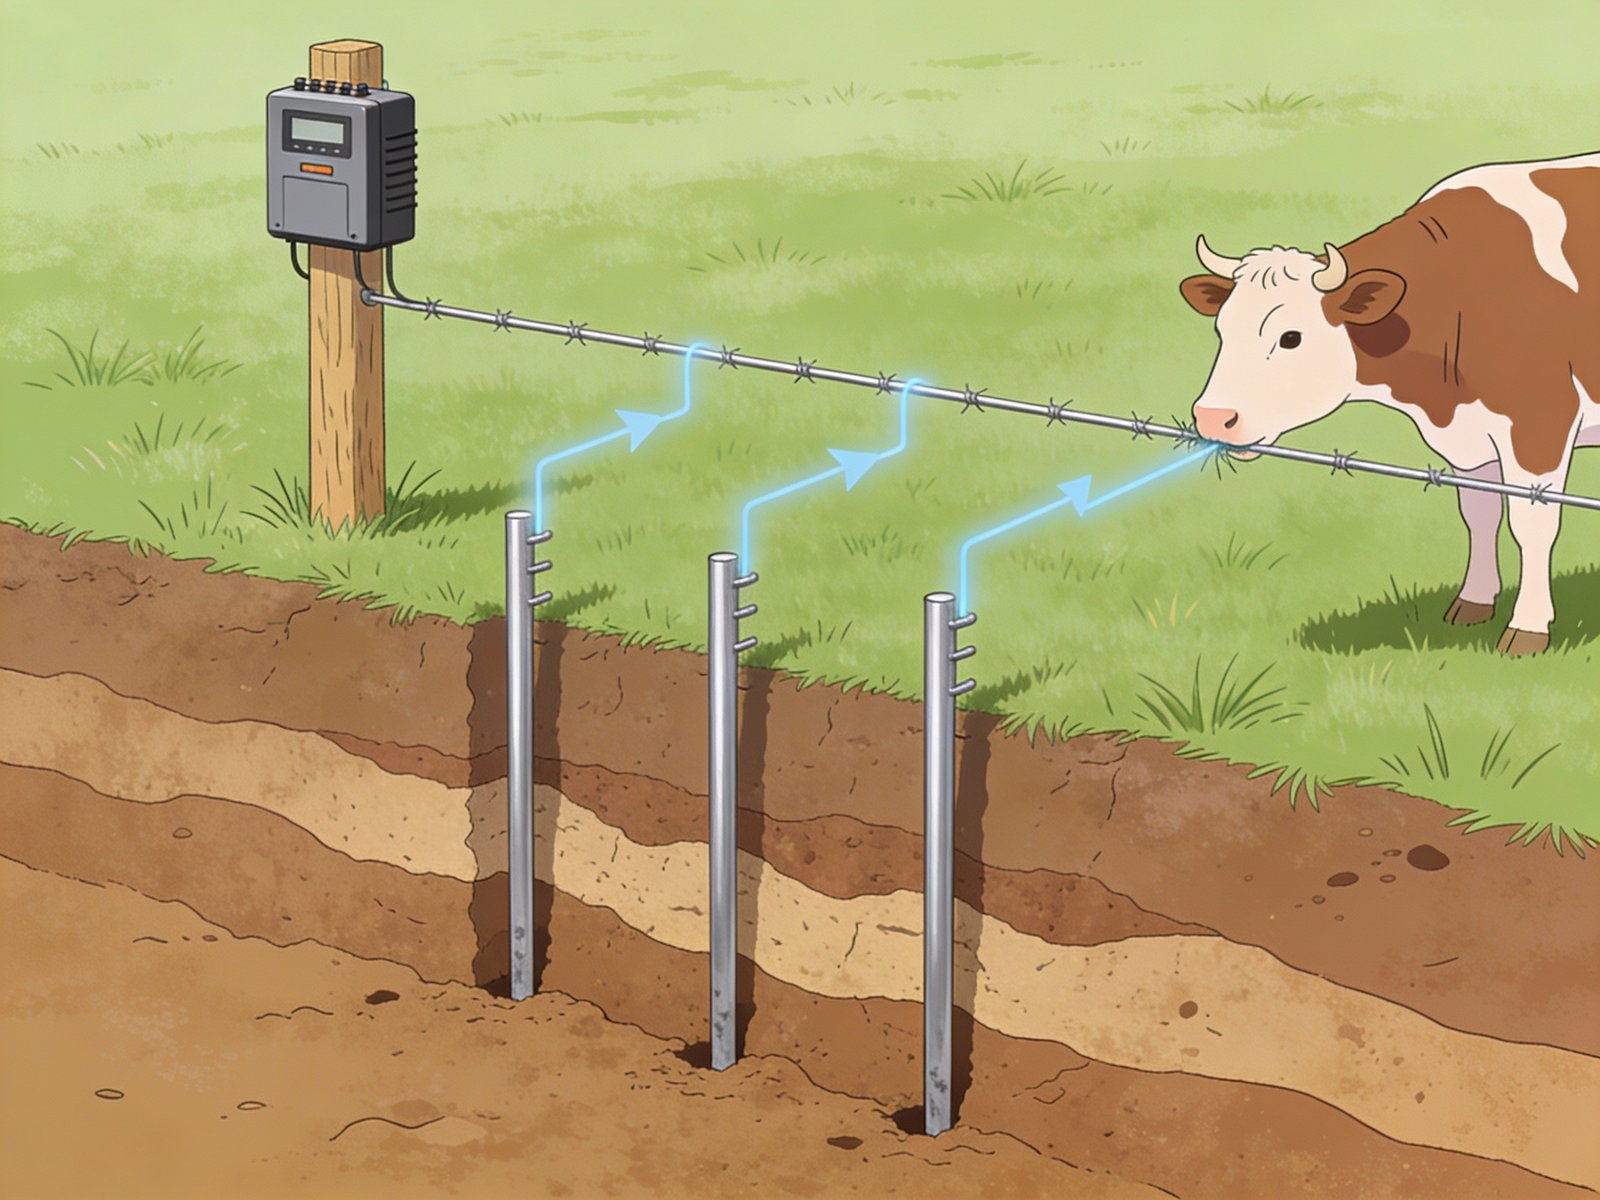
Step 2: Check the Grounding System
Poor grounding is the most common cause of electric fence problems. Test grounding by creating a deliberate short on the fence wire and measuring voltage on the ground rods. Voltage should be under 200-400 volts.
- Install at least three ground rods, 6 feet deep
- Ensure rods are fully driven into moist soil
- Clean and tighten all grounding connections
- Test during both wet and dry conditions
Step 3: Test the Lead-Out Wire
With the energizer on and fence disconnected, test voltage at the end of the lead-out wire where it connects to the fence. This isolates whether the lead-out wire has damage or is making unintended contact with ground.
Step 4: Reconnect Fence and Measure Voltage Drop
Reconnect the fence and test voltage at multiple points: near the energizer, mid-fence, and at the far end. A steady decline indicates resistance or load somewhere along the line.
Step 5: Use a Fault Finder to Isolate Problem Areas
Walk the fence line with a fault finder that measures both voltage and amperage. The directional arrow will point toward the fault. Test at regular intervals (every 100 meters) and at junctions, gates, and corners.
Step 6: Walk the Fence Line and Inspect
Once you’ve narrowed down the problem area, physically inspect the isolated section for:
- Vegetation touching the wire
- Broken or cracked insulators
- Loose or corroded connectors
- Gate handle shorts
- Buried wire insulation damage
- Wire making contact with metal posts
Common Electric Fence Problems and Solutions
Low Voltage Across Entire Fence
Causes: insufficient grounding, undersized energizer, heavy vegetation load
Solutions: add ground rods, clear vegetation, upgrade energizer output. This issue is often traced to common installation mistakes during initial setup.
Voltage Drops Only at Far End
Causes: long fence runs, poor splices, undersized conductor wire
Solutions: improve connections, loop fence, use higher-conductivity wire
Fence Shocks Inconsistently
Causes: loose joints, broken insulators, intermittent shorts, faulty gate handles
Solutions: tighten connections, replace insulators, inspect gates and corners
Fence Tester Reads Zero
Causes: disconnected fence, failed energizer, broken lead-out cable
Solutions: reconnect fence, test energizer independently, replace underground cable with 20kV rated wire
Energizer Damaged After Storm
Causes: lightning strike, power surge
Solutions: install lightning protection and surge arrestors, ensure proper grounding
Advanced Troubleshooting Scenarios
Electric Fence Works in Wet Weather but Not Dry
This indicates inadequate grounding. Dry soil increases resistance, preventing current from returning to the energizer. Add additional ground rods or drive existing rods deeper to reach moist soil layers.
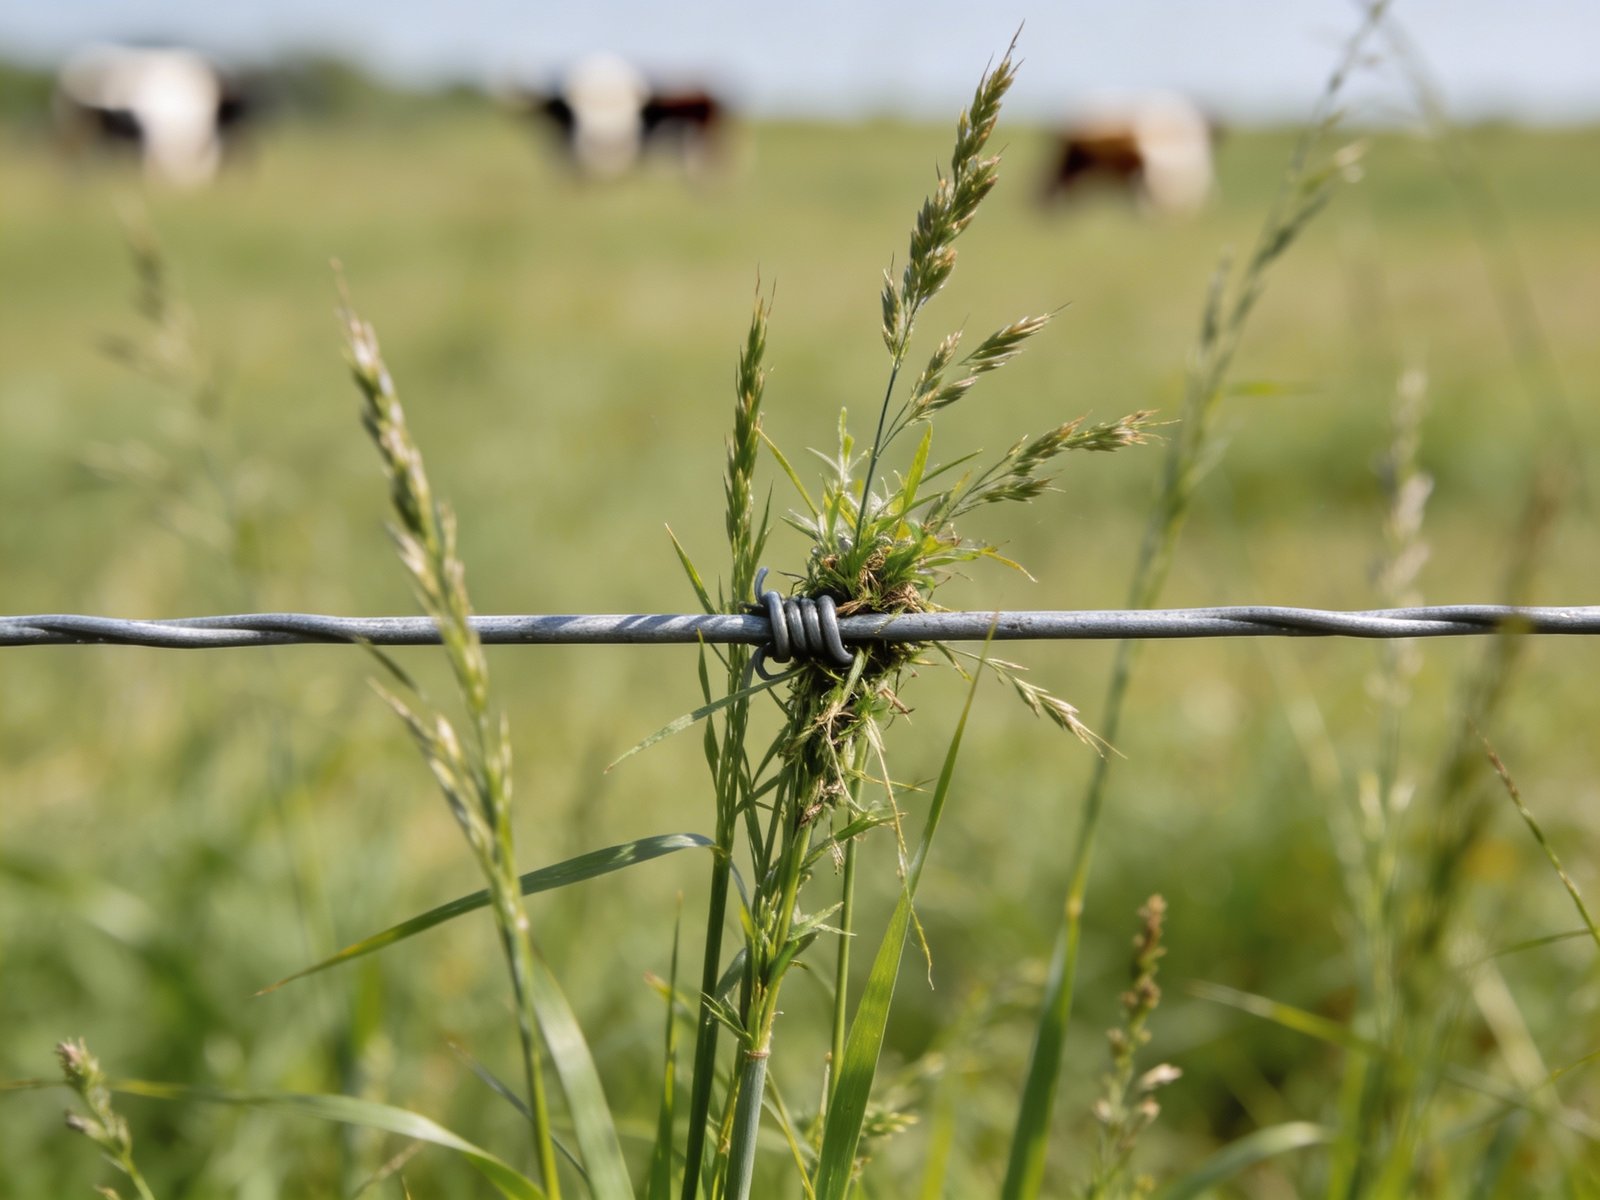
Fence Voltage Drops Suddenly After Rain
Rain increases vegetation conductivity. Grass and weeds touching the wire may short the system under wet conditions. This is especially common with poly wire and tape installations where vegetation contact is more frequent.
Repeated Insulator Failures
UV exposure, low-quality materials, or excessive tension can cause insulators to crack and leak current. Invest in UV-resistant insulators rated for your wire type and ensure proper tension during installation.
Voltage Loss in Multi-Species Enclosures
Different animals require different voltage levels. In multi-species fencing situations, ensure your energizer has sufficient output for the most difficult animal to contain.
Preventing Future Electric Fence Problems
Prevention Checklist
- Use properly sized energizers for your fence length and animal type
- Install adequate grounding from day one (minimum three 6-foot rods)
- Control vegetation proactively through mowing or herbicides
- Use quality insulators and connectors rated for outdoor use
- Test voltage monthly during active grazing season
- Document recurring issues and their locations
- Schedule routine maintenance before peak season
- Prepare for seasonal challenges like drought and vegetation growth
Integration with Rotational Grazing
Electric fence reliability is critical for rotational grazing systems. Test temporary fence sections before moving cattle, and maintain a higher voltage standard (5,000V+) for frequently moved paddocks where cattle may test boundaries more often.
Frequently Asked Questions
Why is my electric fence not working but the energizer is on?
This usually indicates a grounding issue, vegetation short, or disconnected fence line. Start by testing the energizer output with the fence disconnected. If the energizer tests correctly, the problem is in the fence line, grounding system, or lead-out wire.
How do I find a short in a long electric fence?
Divide the fence into sections by disconnecting at gates or junctions. Test voltage in each section to isolate where the voltage drops. Use a fault finder with directional arrows to walk toward the problem area. Test at regular intervals until you locate the exact short.
Can an electric fence lose power over distance?
Yes. Resistance increases with distance, especially on undersized conductors or poor connections. Use higher conductivity wire for long runs, ensure all connections are tight and corrosion-free, and consider looping the fence to reduce voltage drop.
Recommended voltage levels for electric cattle fences:
- Minimum effective voltage: 4,000 volts
- Ideal operating range: 5,000–7,000 volts
- Higher voltage needed for untrained or boundary-testing cattle
How often should I test my electric fence?
Test voltage at least monthly during grazing season, and after any severe weather events. More frequent testing is recommended during periods of heavy vegetation growth or extreme drought when grounding effectiveness changes.
Do I need to train cattle to respect electric fences?
Yes. Proper cattle training significantly reduces fence testing behavior and improves long-term containment effectiveness, which in turn reduces troubleshooting needs.
Key Troubleshooting Takeaways
Related Electric Cattle Fencing Resources
Installation and Setup
- Installing Electric Cattle Fences – Complete installation guide to prevent future troubleshooting needs
- Grounding System Design and Testing – Proper grounding prevents 70% of electric fence problems
- Insulator Selection and Installation – Choosing and installing insulators that won’t fail
- Common Installation Mistakes – Avoid issues that lead to chronic troubleshooting
Fence Components and Design
- Fence Energizer Guide – Selecting the right energizer capacity prevents weak voltage issues
- Energizer Power Source Selection – Choose reliable power for consistent fence performance
- Wire and Conductor Material Comparison – Better conductors mean fewer voltage drop problems
- Poly Wire and Tape Guide – Understanding portable fence conductor options
- Gate Systems for Electric Fences – Gates are common failure points requiring proper design
Management and Performance
- Electric Fence Maintenance – Preventive maintenance reduces emergency troubleshooting
- Weather and Seasonal Electric Fence Management – Anticipate and prevent seasonal performance issues
- Rotational Grazing with Electric Fencing – Maintain fence reliability in intensive grazing systems
- Multi-Species and Mixed Herd Fencing – Troubleshooting fences for multiple animal types
Safety and Protection
- Electric Fence Safety – Safe troubleshooting practices and regulatory compliance
- Lightning Protection and Surge Prevention – Prevent energizer damage from electrical storms
- Predator Protection Electric Fencing – Higher voltage requirements for predator deterrence
System Understanding
- How Electric Fences Work – Understanding the circuit helps diagnose problems faster
- Training Cattle to Respect Electric Fences – Proper training reduces fence testing and wear
- Best Electric Fence for Cattle – Comprehensive comparison of fence types and systems
- Cost Comparison and ROI Analysis – Long-term value of quality components that require less troubleshooting
For additional guidance or complex troubleshooting situations, contact our fencing experts for personalized assistance.