
Grounding System Design & Testing for Electric Fencing
Complete guide to designing, installing, testing, and maintaining proper grounding systems for electric cattle fencing
Why Grounding Is the Most Critical Part of Electric Fencing
In an electric fencing system, grounding is not optional—it is the return path that completes the electrical circuit. Without proper grounding, even the most powerful energizer cannot deliver an effective shock.
More electric fence failures are caused by poor grounding than by energizer problems, broken wire, or vegetation load combined. Research shows that 70 to 80 percent of all electric fence failures can be traced back to inadequate grounding systems.
How Electric Fence Grounding Works
An electric fence shock occurs when current flows from the energizer, through the fence wire, into the animal, and back to the energizer through the soil and grounding system. Understanding this circuit is fundamental to proper fence performance.
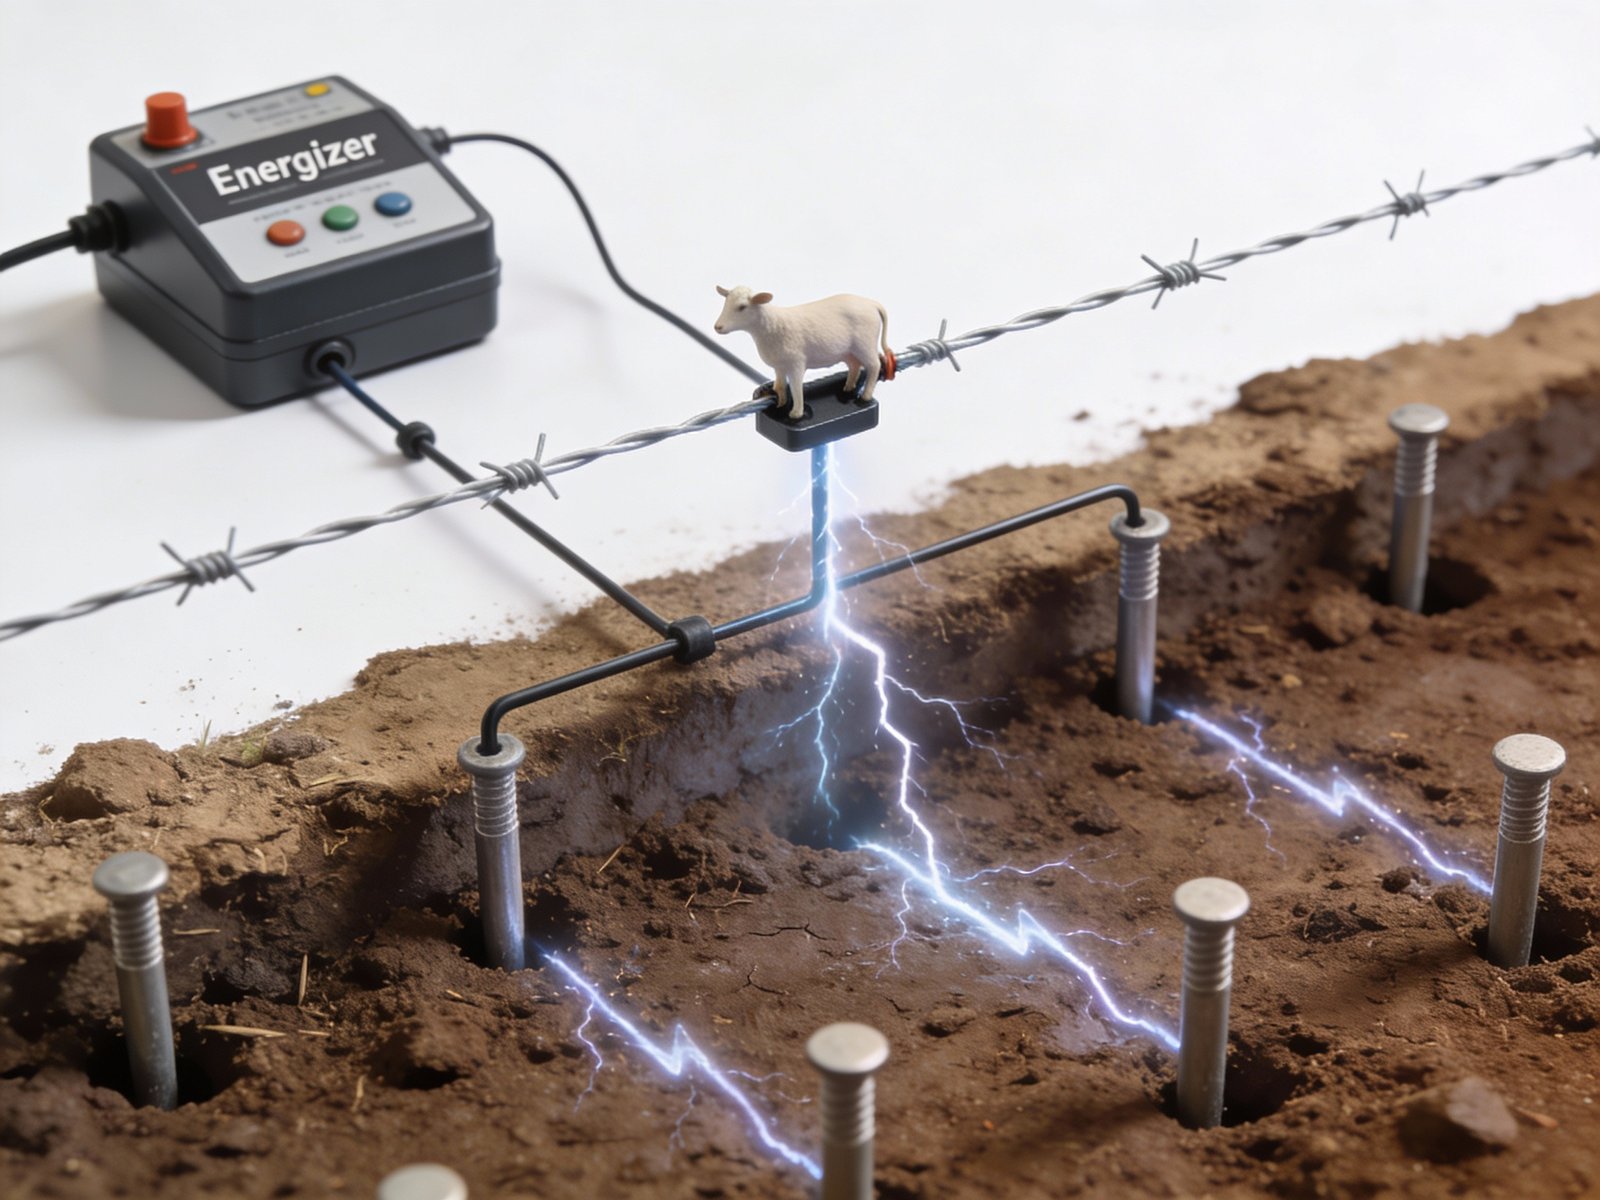
⚡ The Electrical Circuit Explained
- Energizer sends a high-voltage pulse
- Fence wire carries the pulse
- Animal contacts the wire
- Current travels through the animal into soil
- Ground rods collect current from soil
- Ground wire returns current to energizer
Grounding System Design Principles
How Many Ground Rods Do You Need?
| Energizer Output | Recommended Ground Rods | Typical Application |
|---|---|---|
| < 2 joules | 2–3 rods | Small paddocks |
| 2–5 joules | 3–5 rods | Medium cattle operations |
| 5–15 joules | 5–7 rods | Large systems |
| 15–25 joules | 7–9 rods | Very large or high-load systems |
| 25+ joules | 9+ rods | Extensive operations |
Industry guidelines recommend a minimum of three ground rods for energizers up to 15 joules, five rods for energizers up to 25 joules, and seven rods for energizers up to 35 joules. When in doubt, add more rods. Excess grounding capacity never reduces performance and provides insurance against seasonal soil changes. The proper energizer selection must be matched with adequate grounding to achieve full system potential.
Installing Ground Rods Correctly
Rod Placement
- Install rods in a straight line or gentle arc
- Space rods 6–10 feet apart minimum
- Choose shaded, moist soil if possible
- Position within 20 feet of energizer for first rod
- Avoid areas near concrete foundations or gravel
- Select locations with permanent moisture sources nearby
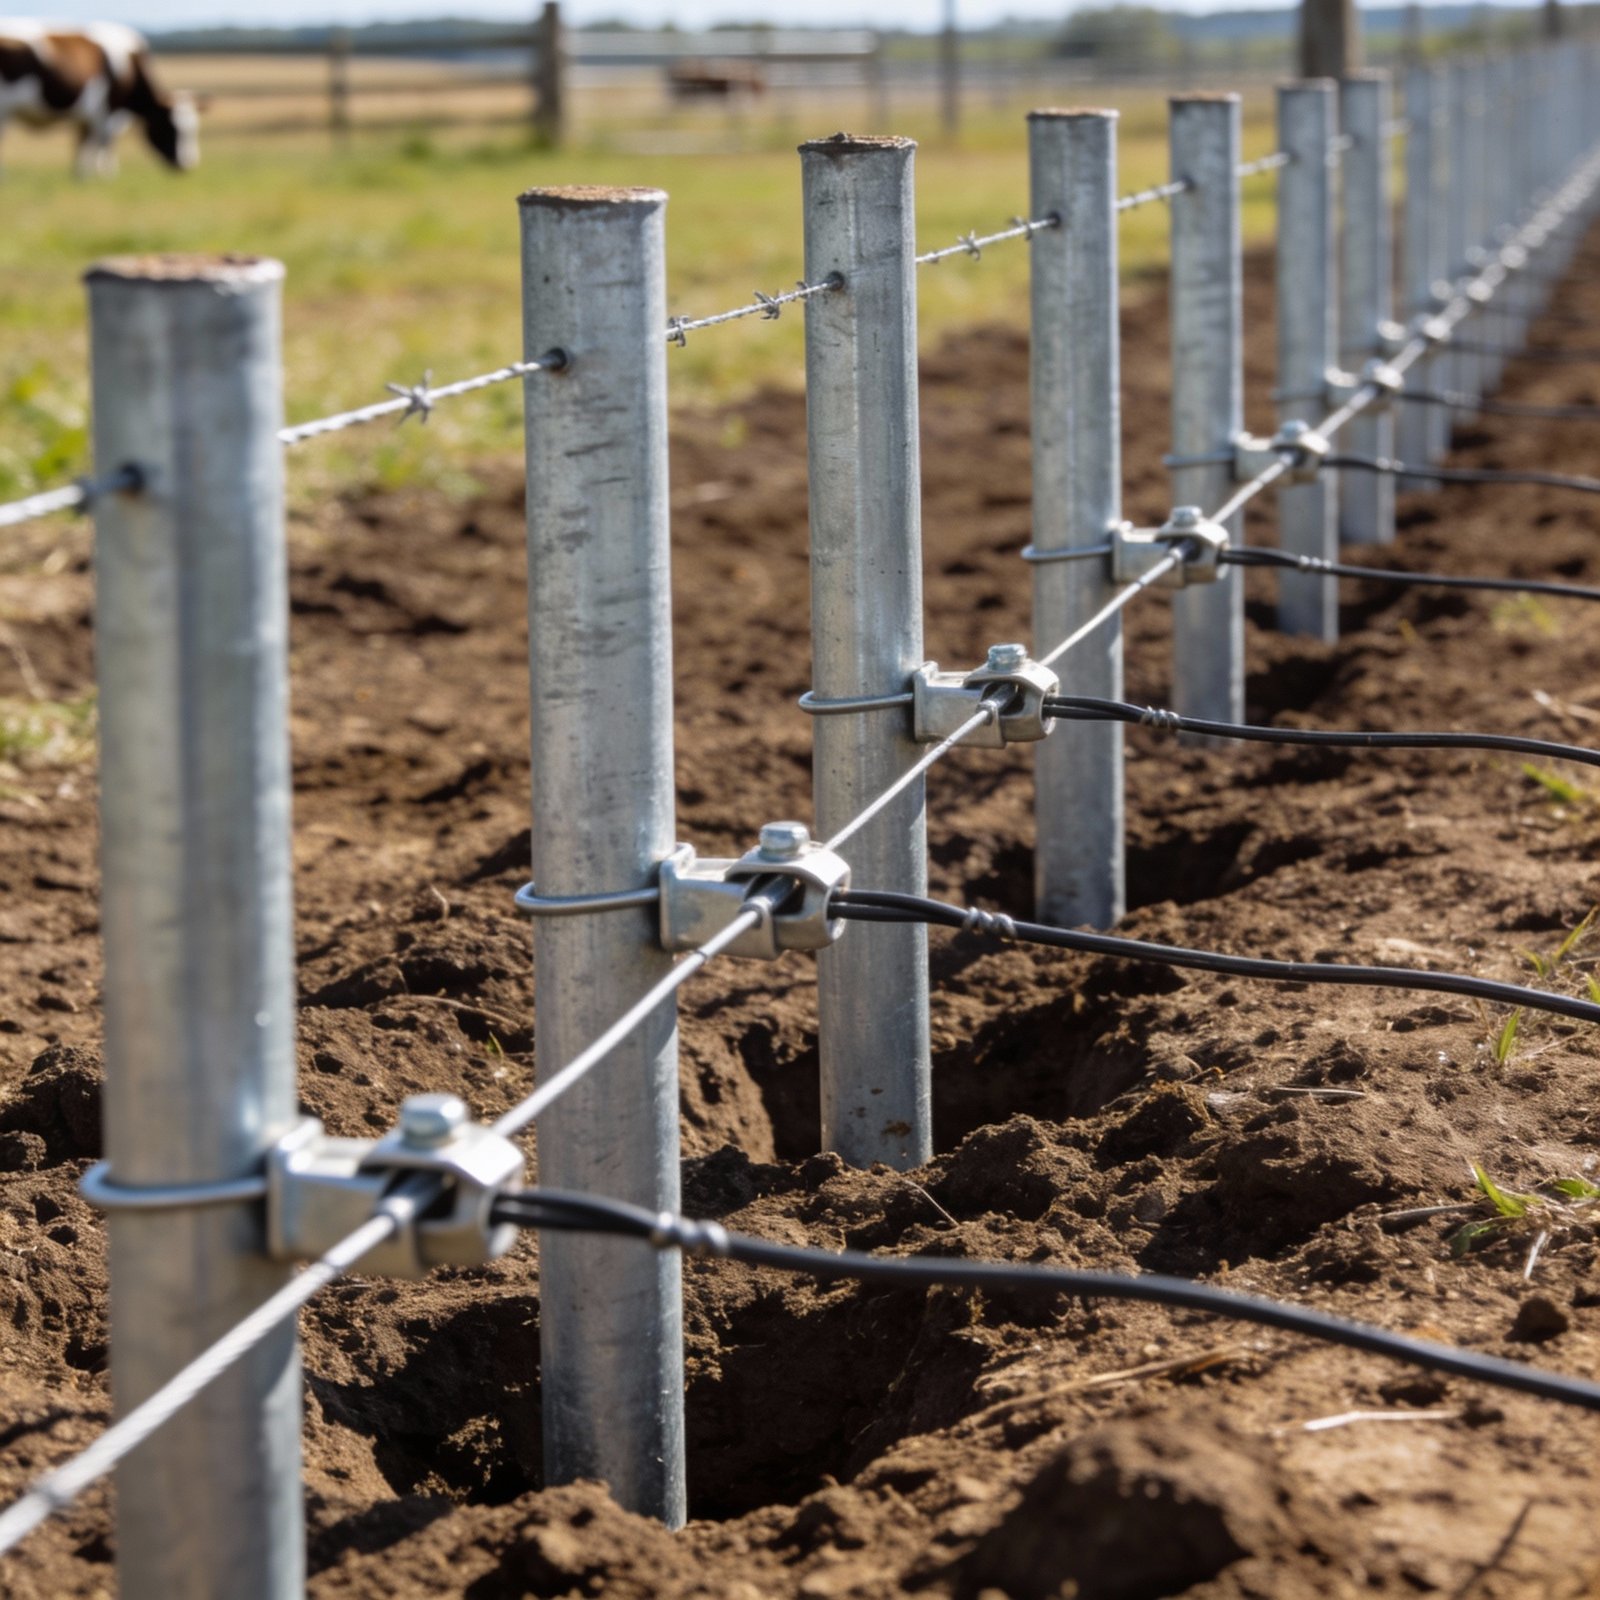
Connection Method
- Use galvanized or copper grounding wire, minimum 12.5 gauge
- Clamp connections securely with proper ground rod clamps
- Use insulated hookup wire to prevent soil contact corrosion
- Connect rods in daisy-chain fashion with one continuous wire
- Strip wire ends to expose metal for solid electrical contact
- Avoid aluminum wire underground due to corrosion
- Drive rods as deep as possible, leaving only a few inches exposed
How to Test an Electric Fence Grounding System
Testing your grounding system at least once per year ensures consistent fence performance. Testing during dry weather reveals worst-case grounding conditions when soil conductivity is lowest.
Ground Test Procedure
- Turn the energizer on and verify fence is powered
- Short the fence with multiple metal rods 300 feet away from energizer
- Add rods until fence voltage drops to approximately 2,000 volts or less
- Use a digital voltmeter with ground probe
- Insert ground probe into soil near final ground rod
- Attach red voltmeter lead to the last ground rod
- Measure voltage between ground rod and soil
- Reading should be under 300 to 500 volts
Interpreting Test Results
If voltage exceeds 300 to 500 volts, grounding is insufficient. The excess voltage indicates current cannot flow efficiently through the ground system back to the energizer. Add additional rods spaced 6 to 10 feet from existing rods, improve soil moisture around rods, or consider ground enhancement materials. Readings below 300 volts indicate excellent grounding performance. Regular testing helps identify grounding degradation before it affects livestock control.
Video: Testing Electric Fence Grounding Systems
This video demonstrates a real-world electric fence grounding test, showing how to short the fence line, measure voltage at the ground rod, and interpret test readings. It visually explains why readings above 300 volts indicate insufficient grounding and how adding additional ground rods or improving soil moisture restores fence performance. The demonstration reinforces best practices for annual grounding inspections and helps diagnose weak shock problems caused by grounding failure rather than energizer output.
Additional testing resources: Watch How To Check Your Earthing with Gallagher and Grounding Your Electric Fence Properly for more detailed testing demonstrations.
Grounding in Different Soil Conditions
Soil type and moisture dramatically affect grounding performance. Understanding your soil conditions helps determine proper rod quantity and placement.
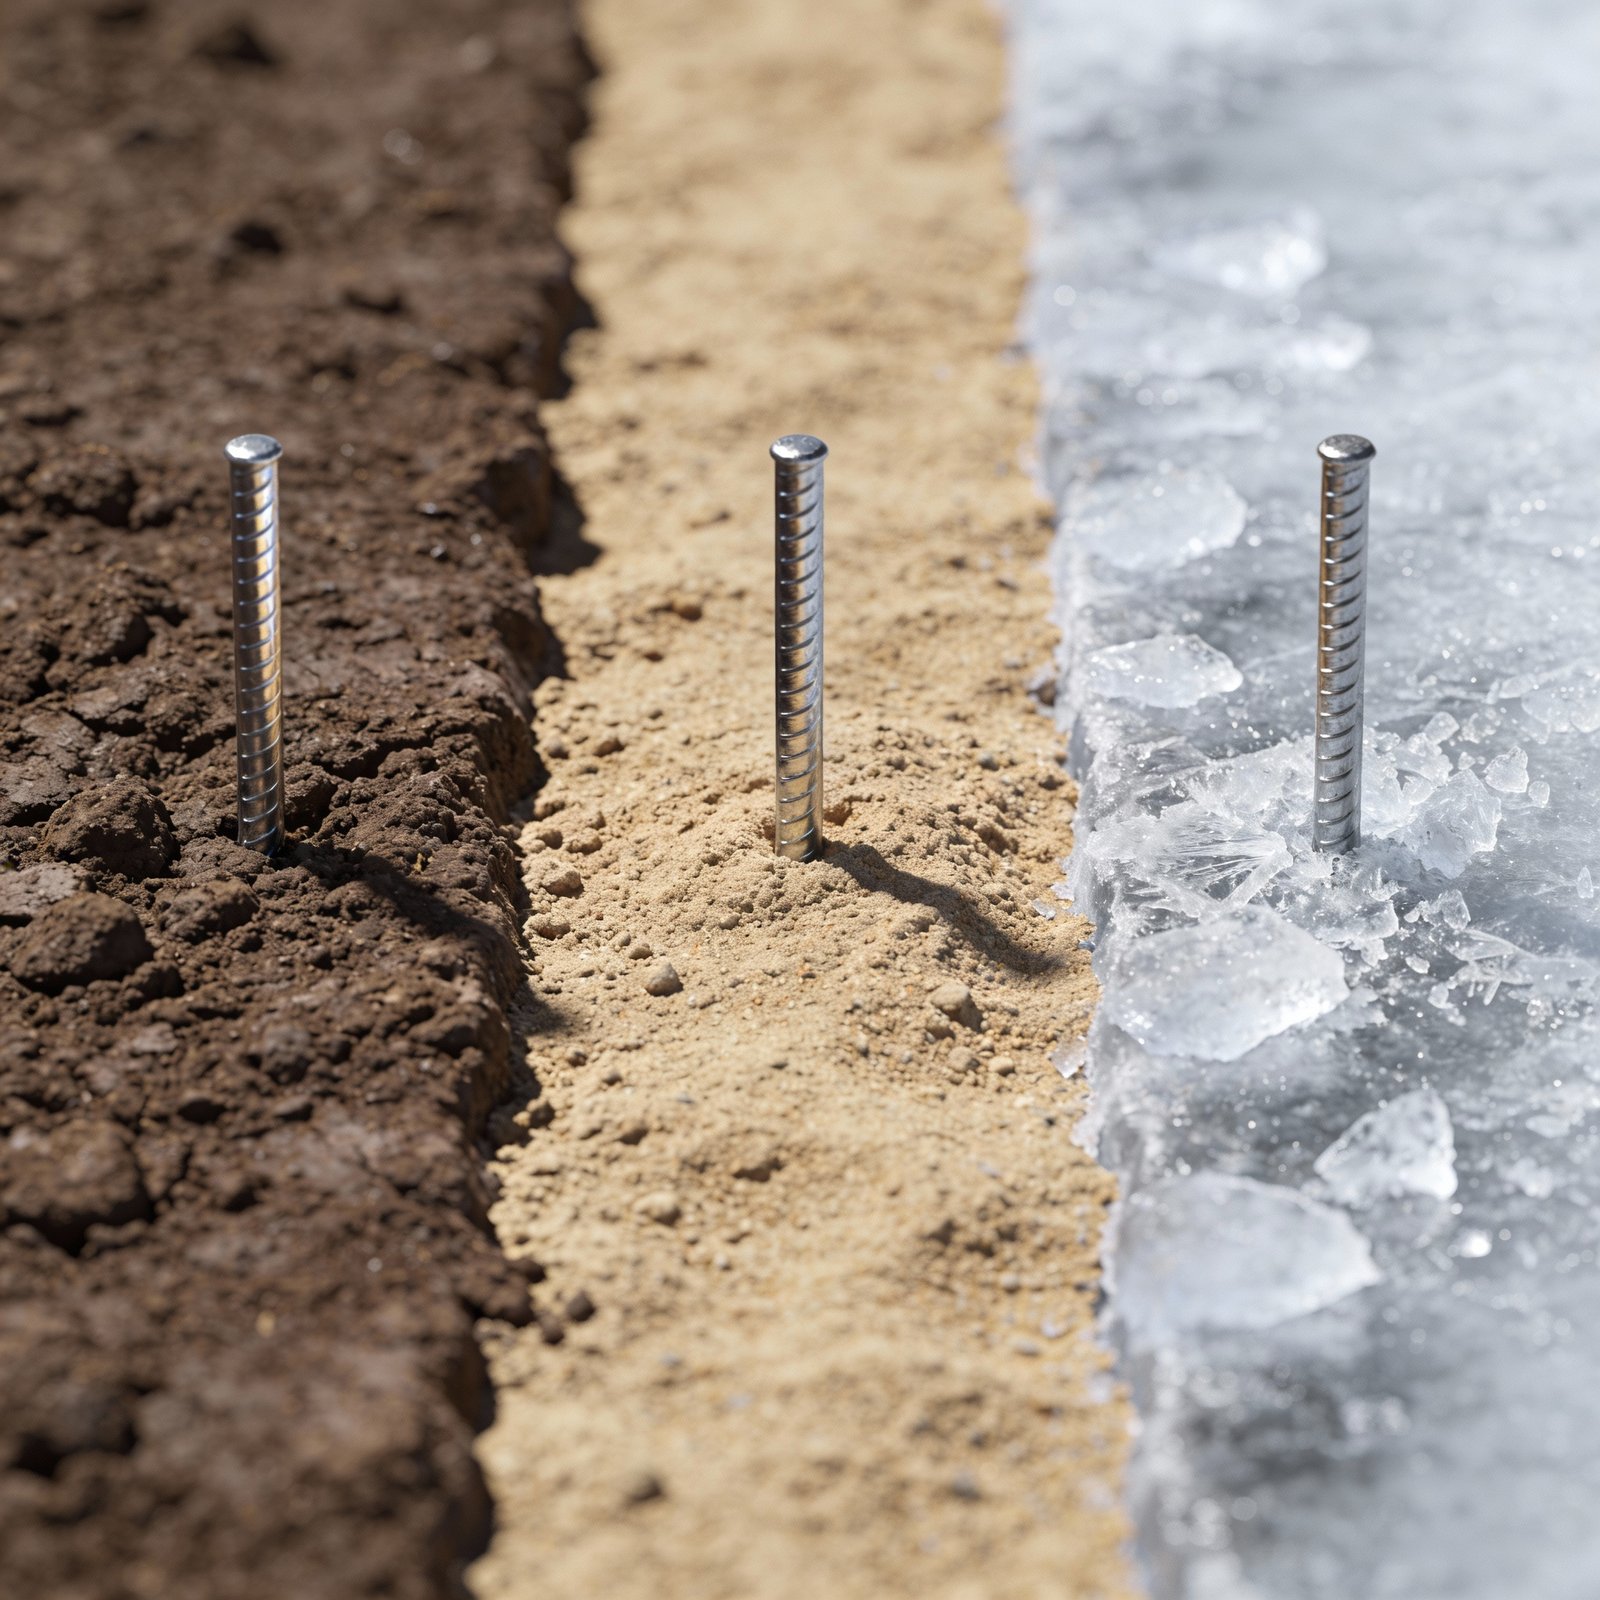
🌱 Moist Clay Soil
- Excellent conductivity
- Fewer rods required
- Consistent year-round performance
- Ideal grounding conditions
🏜 Sandy or Dry Soil
- High resistance
- More rods required
- Water rods if needed temporarily
- Consider two-wire ground return system
❄ Frozen Ground
- Install rods below frost line
- Use additional rods
- Test system before freeze
- Plan for reduced winter conductivity
In areas with long hair animals like wool sheep, or locations with sandy or rocky soil where ground return is poor, consider a two-wire ground return system. This system alternates charged and ground wires on the fence line, allowing animals to complete the circuit by touching both wires simultaneously rather than relying solely on soil conductivity.
Common Grounding Problems and Solutions
Poor grounding can cause voltage reflection that stresses energizer components over time. If your fence system shows weak performance despite a properly functioning energizer, grounding is the most likely culprit. Review our electric fence maintenance guide for ongoing system care that prevents grounding degradation.
Grounding Best Practices
Grounding Checklist
- Minimum 3 ground rods for systems up to 15 joules
- 6–10 ft spacing between all rods
- Galvanized steel or copper rods, 6 to 8 feet long
- 12.5 gauge or larger insulated wire connections
- Proper ground rod clamps at each connection
- Test grounding annually during dry conditions
- Inspect clamps for corrosion each season
- Add rods before upgrading to larger energizer
- Position rods near permanent moisture sources
- Keep rods isolated from building grounding systems
- Drive rods as deep as possible into soil
- Use one continuous wire connecting all rods
Proper grounding must be established before expecting effective cattle training. Without adequate ground return, even the best training methods cannot overcome weak shock delivery caused by insufficient grounding.
Frequently Asked Questions
Can poor grounding damage an energizer?
Yes. Excess resistance can cause voltage reflection and stress internal components over time. Proper grounding protects your energizer investment and ensures rated output performance.
Can I use building grounding rods for my electric fence?
No. Fence grounding must be isolated from buildings for both safety and performance reasons. Shared grounding can create stray voltage issues and reduce fence effectiveness.
Is watering ground rods a permanent solution?
No. It is a temporary fix during extreme dry conditions only. Long-term solutions include adding more ground rods, installing a two-wire ground return system, or using ground enhancement materials.
How do I know if I need more ground rods?
Test your grounding system using the procedure outlined above. If voltage at the ground rod exceeds 300 to 500 volts during load testing, add more rods until readings drop below this threshold.
Should I use copper or galvanized steel ground rods?
Both work well. Copper conducts electricity more efficiently but costs more. Galvanized steel rods are durable and cost-effective for most cattle fencing applications. Avoid using rebar due to faster corrosion.
How often should I test my grounding system?
Test at least once per year during the driest part of the season when grounding is most challenged. Also test after upgrading your energizer, adding significant fence length, or experiencing unexplained weak fence performance.
What is a two-wire ground return system?
A two-wire system alternates charged and ground wires on the fence line. Animals complete the circuit by touching both wires simultaneously rather than relying on soil conductivity. This system works well in sandy, rocky, or dry soil conditions, or with long-haired animals.
Key Grounding Takeaways
Need Help With Your Grounding System?
Proper grounding is essential for electric fence performance. Whether you are installing a new system or troubleshooting an existing fence, quality materials and correct installation make the difference between reliable livestock control and constant frustration.