
Complete Guide to Installing Woven Cattle Fence Wire
Table of Contents
- Product Overview
- Tools & Materials Required
- Pre-Installation Preparation
- Detailed Installation Steps
- Maintenance & Care
- Frequently Asked Questions
- Safety Recommendations
Product Overview
What is Woven Cattle Fence Wire?
Woven cattle fence wire is a professional-grade fencing material designed specifically for farms, ranches, and livestock operations. This specialized fence features an interwoven design with several distinctive characteristics:
- Construction: Steel wire woven in a crosshatch pattern, creating a strong mesh grid structure
- Material Grade: High-carbon steel with exceptional tensile strength
- Standard Specifications:
- Common heights: 24 inches, 32 inches, 39 inches, 48 inches
- Roll lengths: 100 feet, 330 feet, and custom sizes
- Mesh spacing: 4×4 inches, 6×6 inches, and other configurations
- Ideal For: Cattle, horses, sheep, pigs, and other medium to large livestock
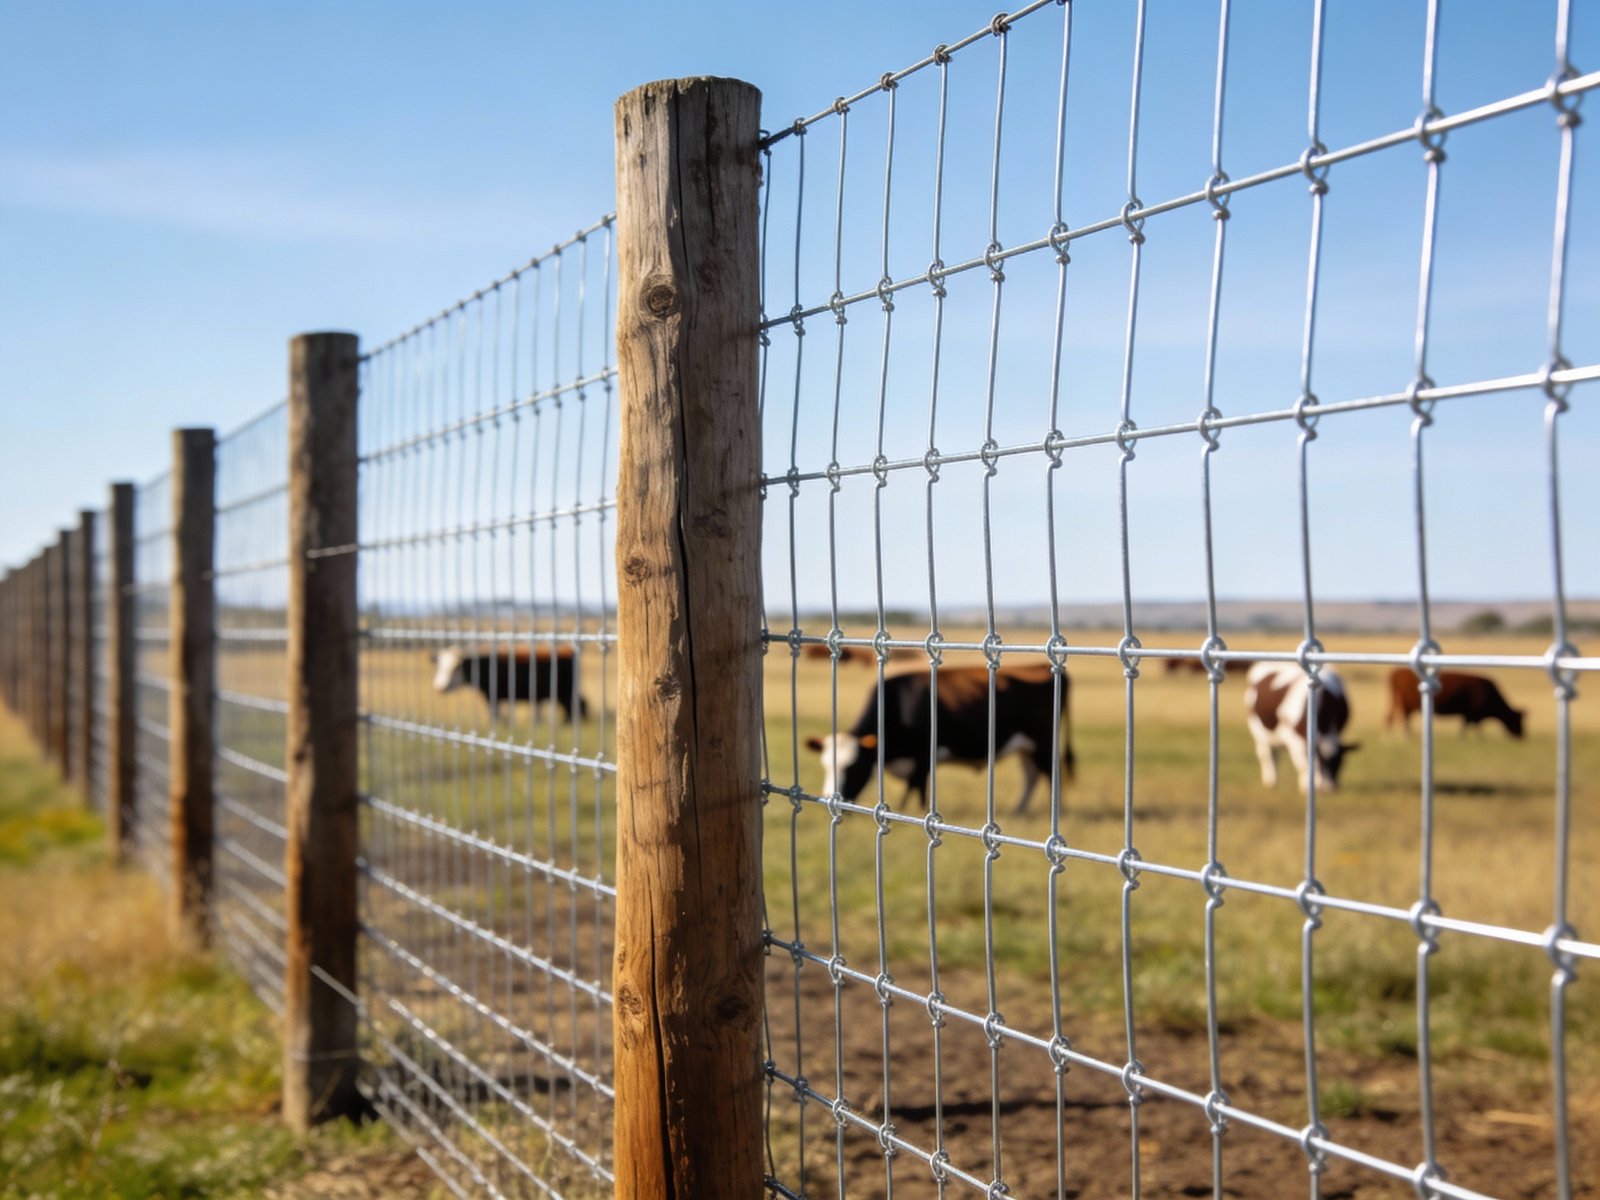
Figure 1: Woven cattle fence wire installed on wooden posts at a working ranch
Key Advantages of Woven Cattle Fence
- Superior Strength: The woven structure provides excellent resistance to pressure and impact
- Extended Durability: Galvanized coating prevents rust and extends service life to 15+ years
- Animal Containment: Dense mesh design prevents livestock escape and protects from predators
- Installation Simplicity: Easier to install compared to many alternative fencing systems
- Cost Efficiency: Excellent value for long-term livestock management
- Low Maintenance: Minimal upkeep required with proper installation
Tools & Materials Required
Essential Tools
| Tool Name | Purpose | Notes |
|---|---|---|
| Hammer / Pneumatic Nailer | Fastens wire to fence posts | Air-powered or manual options both effective |
| Fence Puller (Stretcher) | Applies tension to fence wire | Manual or mechanical systems available |
| Pliers | Cuts and bends wire | Carry multiple pairs for efficiency |
| Measuring Tape | Measures distances and heights | 50+ feet recommended |
| Level | Ensures posts are plumb | 2-3 feet length ideal |
| Work Gloves & Safety Glasses | Personal protection equipment | Essential for safety |
| Ladder | Access for elevated work | Required for taller installations |
| File or Angle Grinder | Smooths cut wire edges | Optional but recommended |
Material Checklist
| Material | Quantity | Specifications | Purpose |
|---|---|---|---|
| Woven Fence Wire | Per linear feet needed | 24-48 inches height | Primary fencing material |
| Wooden Posts | 1 per 8-12 feet | 4×4 inches, 8-10 feet long | Support structure |
| Top Rail | Per linear feet | 2×4 inches lumber | Enhances stability (optional) |
| Nails | As needed | 2.5-3.5 inches galvanized | Secures wire to posts |
| Concrete | Per post count | Standard concrete mix | Anchors posts (recommended) |
| Lubricant | 1-2 bottles | General-purpose machine oil | Maintains tools |
For detailed information about essential cattle fence installation tools and equipment, consult our comprehensive equipment guide.
Pre-Installation Preparation
Step 1: Planning and Measurement
Determine the Fence Line
- Mark the starting and ending points with visible markers
- Identify all corner locations and direction changes
- Account for terrain elevation changes along the route
- Note any existing structures, trees, or obstacles
Calculate Required Materials
- Measure total linear footage of fence needed
- Calculate wire rolls required based on roll length (typically 330 feet per roll)
- Determine post quantity using 8-12 foot spacing intervals
- Add 10% material surplus for waste and contingencies
- Budget additional materials for corner reinforcement
Assess Site Conditions
- Identify rock outcroppings and embedded debris
- Mark significant elevation changes or slopes
- Plan water drainage patterns
- Note underground utilities (contact “Call Before You Dig” service)
Step 2: Site Preparation
- Remove brush, fallen branches, and vegetation from the fence line
- Trim tree limbs 6+ feet above the planned fence height
- Level ground sections with height variations exceeding 6 inches
- Mark all underground utilities clearly
- Clear work areas of equipment and obstacles
Step 3: Post Spacing Strategy
- 8-foot spacing: Maximum stability; ideal for high-stress areas with heavy animals
- 10-12 foot spacing: Standard installation; best cost-to-strength ratio
Corner and Connection Points
- Plan heavier posts (6×6 inches) or double 4×4s at each corner
- Install diagonal bracing at corners for tension management
- Design connection points for future fence extensions
- Mark all post locations with flags or spray paint before digging
Cost Planning: Use our fence installation cost calculator to estimate total project expenses and labor requirements.
Detailed Installation Steps
Step 1: Installing Fence Posts
1.1 Post Specifications
- Standard Post: 4×4 inch wooden posts, 8-10 feet total length
- In-Ground Depth: 24-30 inches minimum
- Above-Ground Height: 4-5 feet (adjust for fence height requirements)
- Corner Posts: 6×6 inches or doubled 4×4s, buried 30-36 inches deep
1.2 Post Installation Methods
Method A: Concrete Foundation (Recommended)
- Dig holes 24-30 inches deep, 8-10 inches diameter at marked locations
- Insert post and verify plumb using a level
- Mix concrete per manufacturer instructions
- Fill hole with concrete mixture, working out air pockets
- Allow minimum 24 hours for complete curing before tension work
- Check level one final time after curing
Method B: Direct Drive Installation
- Use manual post driver or powered pile driver equipment
- Drive posts minimum 24 inches into ground
- Verify vertical alignment with level at multiple angles
- Confirm post doesn’t bend or split during driving
1.3 Post Inspection and Adjustment
- Check each post for true vertical alignment
- Ensure all posts align to the same height line (variance: ±1 inch maximum)
- Remove and reset any posts exceeding tolerance
- Allow concrete to fully cure before proceeding
Step 2: Installing Top Rail (Optional but Recommended)
- Position 2×4 inch lumber along the top of all posts
- Secure with 3.5-inch nails, 2-3 nails per post location
- Ensure top rail is level along entire fence line
- Top rail improves overall stability and structural integrity
Step 3: Preparing the Starting Post
At the first post:
- Begin approximately 6 inches below the top of the post
- Using pliers, create a loop or hook at the wire’s end
- Wrap the wire securely around the first post
- Use 4-5 nails spaced 4 inches apart
- Drive nails perpendicular to the post surface
- Ensure wire sits flush against the post with no gaps
Step 4: Tensioning and Fastening Wire
4.1 Pre-Tension Preparation
- Unroll the entire fence wire along the fence line
- Inspect for visible damage, corrosion, or defects
- Ensure wire path is clear of twists, kinks, or entanglement
- Remove any debris or obstacles
4.2 Using a Fence Stretcher/Puller
Critical Step for Professional Results
Puller Assembly:
- Assemble the fence puller per manufacturer’s instructions
- Verify all components are securely locked and functional
- Test operation before attaching to fence wire
Wire Installation:
- Thread the wire’s end through the puller’s gripping mechanism
- Ensure the wire is clamped securely without deformation
- Anchor the puller base to a stationary object 2-3 feet beyond the final post (use temporary post or vehicle)
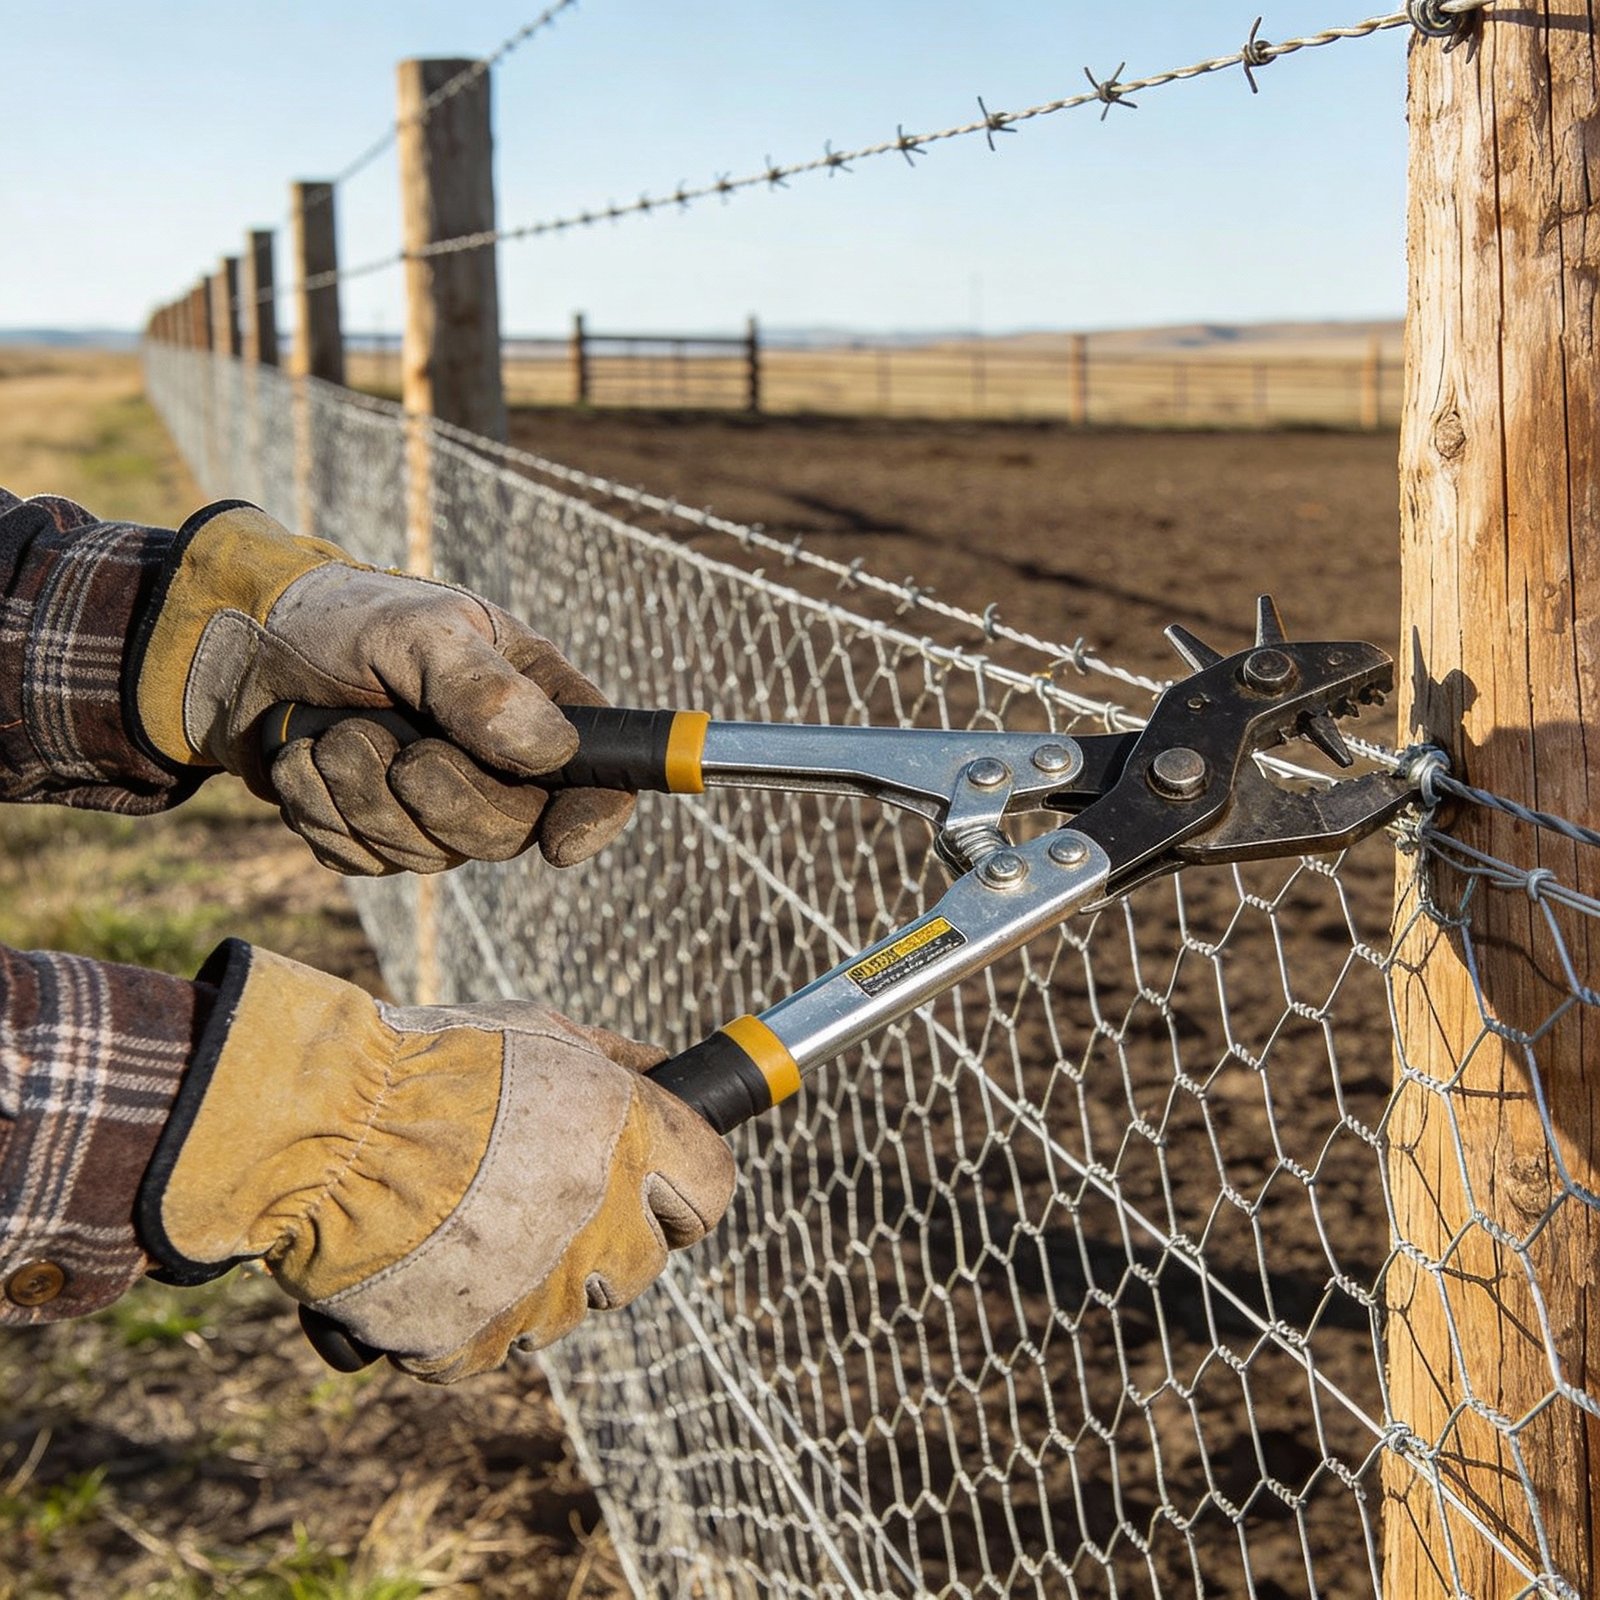
Figure 2: Proper tensioning technique using a fence stretcher tool
Applying Tension:
- Operate the puller handle slowly and steadily
- Monitor tension progress with each lever stroke
- Ideal Tension: When wire is plucked lightly, it produces a clear metallic ring
- Danger Zone: Over-tightening causes wire breakage or post leaning
- Stop immediately if you hear wire creaking or posts flexing
- Never exceed maximum tension ratings for the wire grade
4.3 Fastening to Intermediate Posts
After achieving target tension:
- Working along the entire wire length, secure to each post
- Nail Spacing: Every 4 inches, beginning 6 inches from post top
- Nails Per Post: 4-6 nails minimum (more for corner posts)
- Nail Placement: Directly under the wire’s lower edge, perpendicular to post
- Verification: Tap each nail to ensure flush seating; check for protruding nail heads
Step 5: End Post Treatment
Securing the Terminal End:
- Thread the wire around the final post at least 3 complete wraps
- Maintain tension during wrapping process
- Cut excess wire, leaving approximately 12 inches for fastening
- Secure with 4-5 nails spaced 4 inches apart
- All wraps must sit flush against the post surface
Finishing Wire Edges:
- Bend the wire’s terminal end downward using pliers
- Alternative: Weld the end to prevent unraveling
- File or grind any sharp edges that could injure livestock
- Remove all metal burrs and protrusions
Step 6: Corner and Connection Handling
Corner Installation
Corner Post Specifications:
- Use 6×6 inch posts or parallel double 4×4s
- Bury 30-36 inches deep for maximum holding power
- Install diagonal braces from ground level to upper post section
- Brace diameter: minimum 3-4 inches, set at 45-60 degree angle
Wire Installation at Corners:
- Pull and secure the incoming line to the corner post with full tension
- Use 6-8 nails for corner fastening (more than standard posts)
- Create a smooth transition around the corner post
- Begin new direction section with the same tension and nailing pattern
For advanced corner solutions, refer to our guide on proper corner bracing systems for cattle fence.
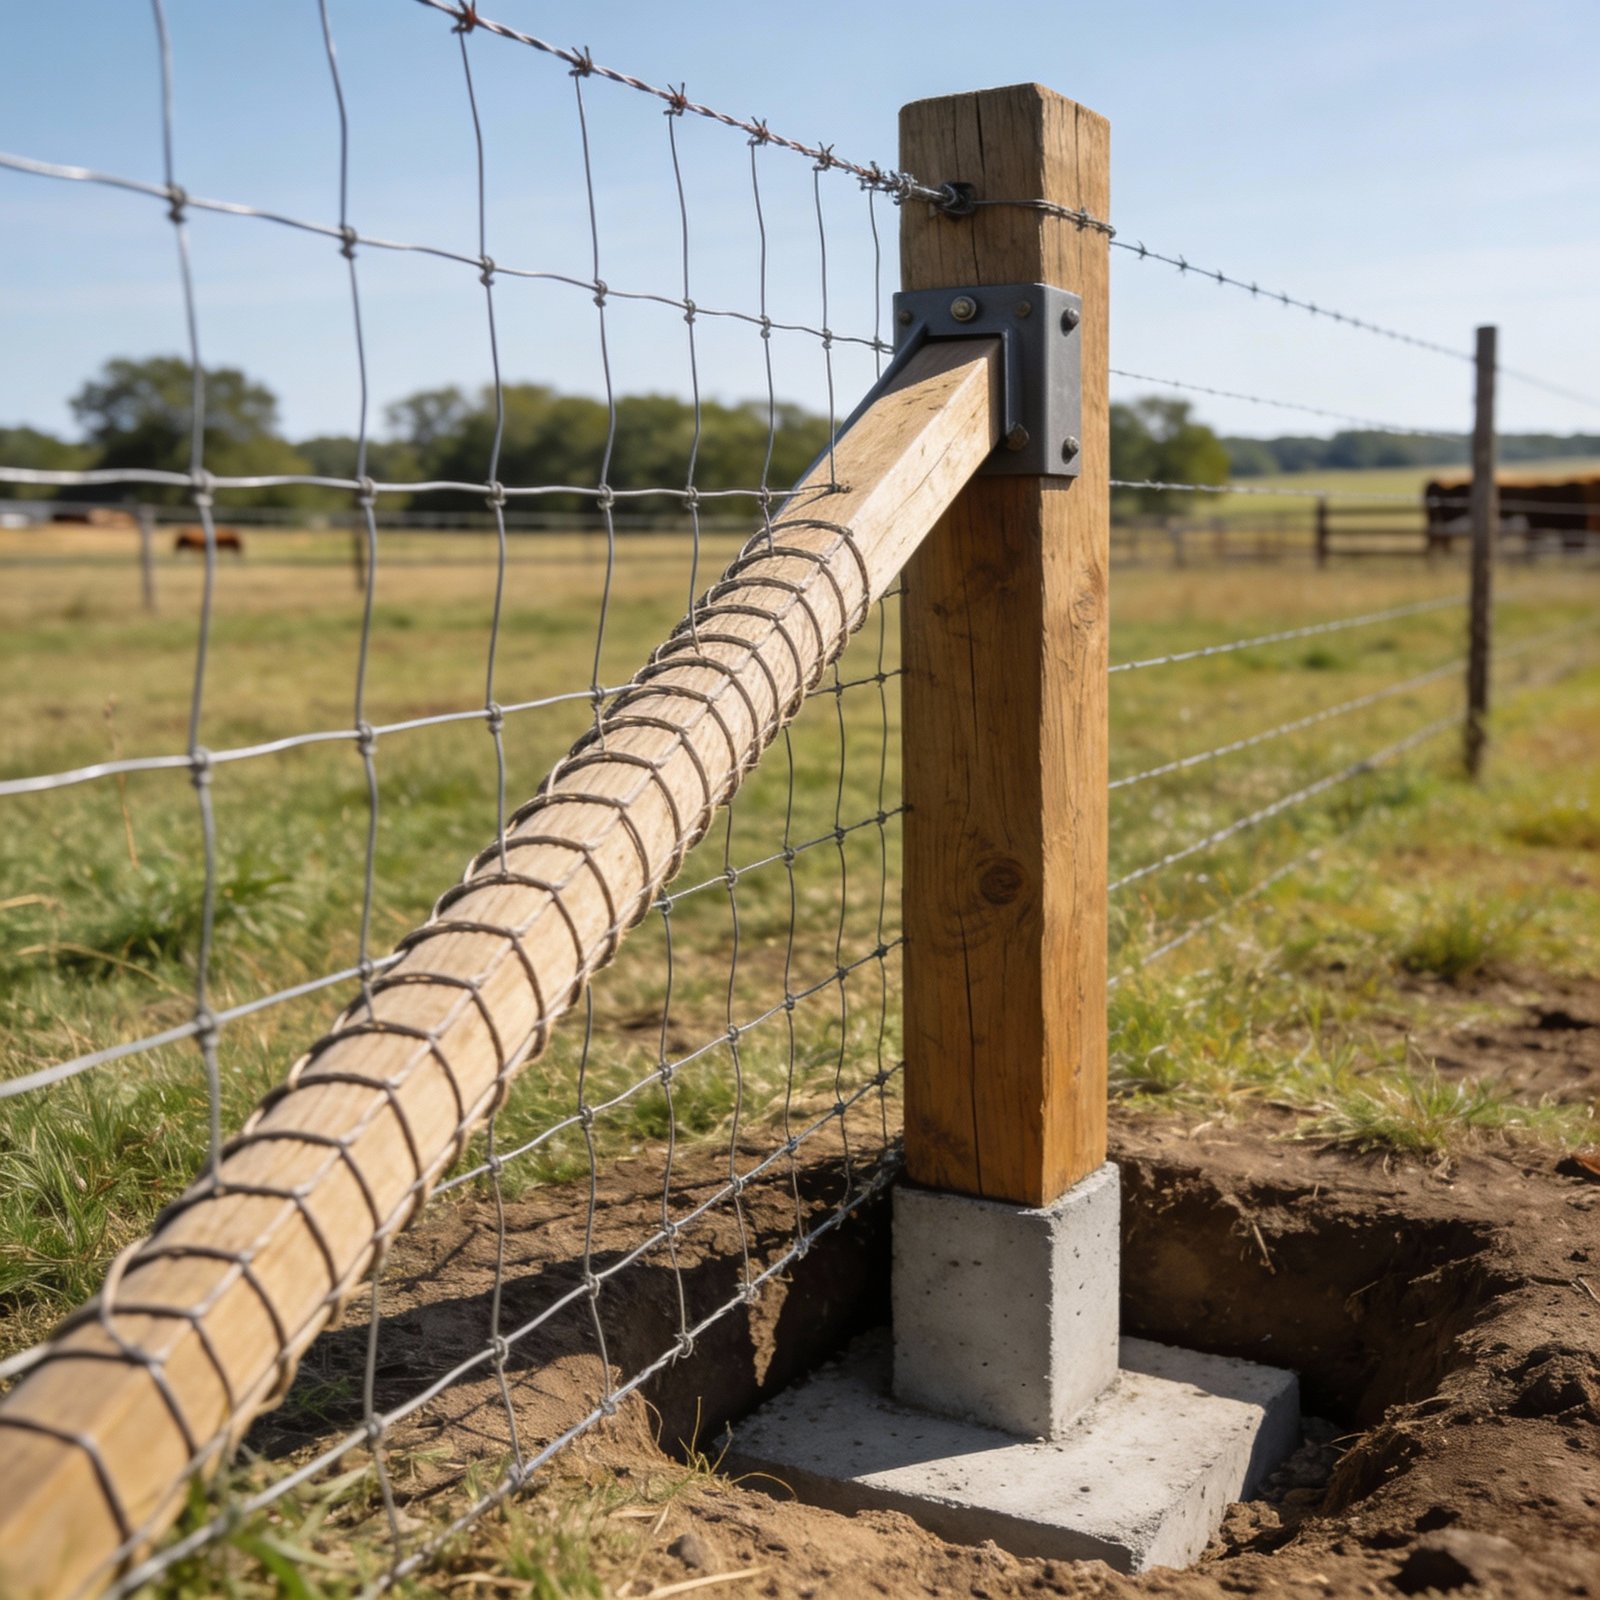
Figure 3: Reinforced corner post with diagonal bracing for tension management
Wire Connections Between Rolls
- When transitioning between wire rolls, overlap ends by minimum 12 inches
- Bind overlapped section securely with spiral clips or wire ties
- Ensure no gaps exist between overlapped sections
- Continue tensioning and fastening through the connection point
Step 7: Final Inspection and Verification
Complete Quality Checklist:
- All posts are perfectly vertical and firmly set
- Wire tension is uniform throughout; no slack sections exist
- Every nail is driven flush with the post surface
- Zero sharp wire protrusions or exposed cut ends
- Fence height meets specification across entire length
- Wire mesh pattern is undamaged and intact
- Corners are properly braced and secure
- All connections are tight with no movement
Maintenance & Care
Inspection Schedule
| Frequency | Inspection Focus | Maintenance Action |
|---|---|---|
| Monthly | Visual damage assessment | Document with photos; note any changes |
| Quarterly | Wire tension verification | Re-tighten loose sections; check nail security |
| Annually | Comprehensive system evaluation | Replace damaged wire; repair or replace posts |
| After storms/snow | Check for impact damage | Support sagging sections; repair as needed |
Common Maintenance Tasks
Tension Adjustment:
- Monitor for wire sagging or slack areas
- Use the fence puller to re-tension loose sections
- Note: Temperature fluctuations cause metal expansion/contraction seasonally
- Perform tension check quarterly, especially in spring and fall
Corrosion Management:
- Inspect galvanized coating for damage or rust spots
- Apply rust-preventative paint to compromised areas
- Replace severely rusted wire sections immediately
- Consider rust-preventative treatments for long-term protection
Post Care:
- Check for wood decay, rot, or termite damage
- Inspect foundation concrete for cracks or settling
- Replace any damaged or deteriorating posts promptly
- Apply wood preservative coating every 2-3 years
Nail and Hardware Inspection:
- Check for nail pull-out or loosening regularly
- Drive any protruding nails back flush with the post
- Replace corroded or bent nails with new galvanized fasteners
- Add additional nails if existing ones show excessive movement
For comprehensive maintenance guidance, consult the woven cattle fence maintenance and repair guide.
Frequently Asked Questions
Q1: What should I do if my fence sags or feels loose?
A: Use a fence puller to re-tension the affected section. Check all nails for looseness and re-drive as needed. Perform tension checks quarterly, as seasonal temperature changes naturally stress the wire.
Q2: How do I handle uneven or sloped terrain?
A: For minor elevation changes (under 6 inches), adjust individual post depth. For significant slopes, you can contour the fence to follow terrain naturally or install multiple horizontal fence lines. Corners may require height adjustments.
Q3: How many nails do I need per post?
A: Standard rule: 4-6 nails per post, spaced 4 inches apart. Use 6-8 nails at corners and end posts for additional security and tension management.
Q4: How often should I inspect my fence?
A: Monthly visual inspections are recommended. Perform detailed tension checks quarterly. Complete system evaluation annually. Check after major storms, heavy snow, or extreme weather events.
Q5: Can I install woven cattle fence during winter?
A: Yes, but frozen ground increases difficulty and post-driving time. Concrete curing takes longer in cold weather. Consider installation during freeze-thaw periods. Electric post drivers are more effective in frozen soil.
Q6: Is used or previously-tensioned fence wire reusable?
A: Not recommended. The tensioning process permanently alters the wire’s metallurgical structure. Reused wire has significantly reduced strength and lifespan. Always use new wire for new installations. Recycle old wire properly.
Q7: How should I manage fence wire around trees or buildings?
A: Leave 2-3 inches clearance around tree trunks to accommodate growth. Trim tree branches regularly to prevent weight bearing on the fence. For buildings, use spacers or brackets to maintain consistent distance and prevent abrasion.
Q8: Do I need permits or local approvals?
A: Regulations vary by jurisdiction. Contact your local agricultural extension, building department, or county assessor’s office. Some areas have setback requirements from roads, power lines, or property boundaries. Verify “Call Before You Dig” requirements before excavation.
Safety Recommendations
Personal Protective Equipment
Essential Safety Gear:
- Safety Glasses: Protects eyes from wire snapping or striking
- Heavy-Duty Work Gloves: Prevents cuts and puncture wounds
- Steel-Toed Boots: Protects feet from dropped materials and tool impact
- Long-Sleeve Clothing: Reduces skin laceration risk
- Sun Protection: Hat and sunscreen for extended outdoor work
- Hearing Protection: If using pneumatic tools or heavy equipment
Tool Safety
- Inspect all tools for damage before use
- Read and follow all manufacturer safety instructions
- Keep cutting tools sharp; dull tools require more force and are more dangerous
- Never operate equipment while fatigued
- Store tools properly and prevent unauthorized access
Wire Tensioning Safety
- Always apply tension gradually and evenly
- Keep personnel clear of potential wire-snap zones
- Never manually pull wire; always use mechanical pullers
- Never over-tension; respect maximum specifications
- Stop immediately if posts begin to lean or wire sounds strained
Post Installation Safety
- Wear protective gear during all driving operations
- Ensure posts go in straight; stop if deviation occurs
- Do not operate heavy equipment alone
- Keep bystanders clear during post installation
- Use proper anchoring and stabilization for equipment
Worksite Management
- Clear the work area of obstacles and hazards
- Use warning flags or signs to mark active work zones
- Inform neighbors and property visitors of ongoing construction
- Maintain clear communication among all workers
- Establish emergency procedures before beginning work
Underground Utility Safety
- Contact your local “Call Before You Dig” service before any excavation
- Locate and mark underground utilities (natural gas, electricity, water, telecommunications)
- Maintain safe distance from marked utilities
- Hand-dig near marked utilities rather than using power equipment
- Report any discovered unmarked utilities immediately
Livestock Safety During Installation
- Move animals to separate pasture before beginning installation
- Inspect completed fence for sharp edges before introducing livestock
- Verify fence height is adequate for your specific animals
- Check regularly for damage that could create hazards for animals
Optimization Tips
Cost Considerations
Material Efficiency:
- Compare pricing from multiple suppliers
- Invest in galvanized wire for superior longevity and lower total cost
- Purchase full rolls rather than partial lengths when possible
- Pool purchasing with neighboring properties for bulk discounts
Labor Planning:
- Prepare thoroughly before beginning work
- Work with neighbors or hire professional installers to accelerate timeline
- Select optimal weather conditions (dry, moderate temperatures)
- Budget adequate time to avoid rushing and safety compromises
Performance Optimization
Maximum Durability:
- Use premium-grade galvanized high-tensile steel wire
- Perform regular maintenance and tension checks
- Install additional support structures in high-stress areas
- Apply protective coatings to vulnerable areas
Visual Consistency:
- Use uniform post heights throughout
- Maintain perfectly straight fence lines (sight-line technique)
- Perform regular vegetation trimming around the fence
- Paint or treat posts for uniform appearance
Special Situations
Mixed Livestock Containment:
- For diverse animals (cattle and sheep together), use smaller mesh spacing
- Consider multi-line installations for animals of different sizes
- Verify fence height accommodates the tallest animals
Steep or Sloped Terrain:
- Reduce post spacing to 6-8 feet for better stability
- Add additional diagonal bracing throughout the fence
- Consider terraced or stepped installation for extreme slopes
High-Pressure Environments:
- Upgrade to premium materials and heavier-duty specifications
- Reduce post spacing to 6-8 feet maximum
- Use 6×6 inch posts throughout instead of standard 4×4s
- Install extensive bracing and reinforcement
Conclusion
Installing woven cattle fence wire is a significant undertaking that demands careful planning, proper preparation, and meticulous execution. By following the comprehensive steps and safety guidelines outlined in this guide, you can construct a durable, effective, and long-lasting fence that reliably protects your livestock for many years.
The key to fence longevity is proactive maintenance. Regular inspection, timely adjustments, and prompt repairs prevent minor issues from becoming major problems. A well-maintained woven cattle fence can provide 15+ years of reliable service.
If you encounter challenges or need expert guidance, consult your local agricultural extension office or hire experienced fence installation professionals. For a complete overview of woven cattle fence systems and related topics, explore our complete woven cattle fence wire resources.
You now have all the information needed to complete a professional-quality woven cattle fence installation. Begin with careful planning, gather your materials, and proceed methodically through each step. Your livestock will benefit from a secure, well-constructed enclosure for years to come.
Last Updated: January 2026
Document Version: 3.0 (English HTML)
Topic Authority: Woven Cattle Fence Installation Guide
Recommended Next Steps: View all woven cattle fence resources